Web development and Tech news Blog site. WEBISFREE.com
Issue Fix: Unable to Use Wide Monitor Resolution with Ubuntu 22
Last Modified : 11 Oct, 2023 / Created : 11 Oct, 2023I attempted to connect a new external monitor to the Ubuntu 22 operating system, but encountered a problem where the resolution could not be changed to 2560x1080. Below, let’s learn how this issue was resolved.
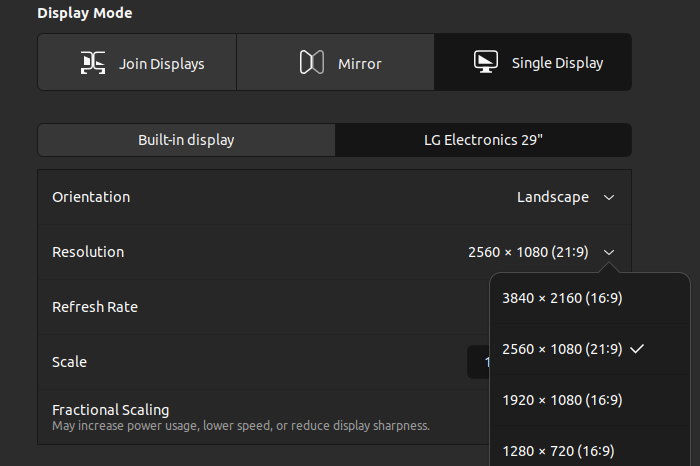 After resolving the issue, the 2560 x 1080 (21:9) mode was added.
First, to change the resolution in Ubuntu, right-click on the desktop and go to Display settings to adjust the resolution. The problem arises when the desired resolution is not listed after selecting the connected monitor.
Such issues are common while using Ubuntu, and while I thought it could be quickly fixed, it wasn't that easy. You can select resolutions using xrandr or arandr.
xrandr is a Linux command that registers and changes the necessary extent on the display. arandr provides similar functionality but in a more straightforward graphical user interface. Here, we will explore how to use xrandr.
To use xrandr, you need to obtain mode information, register a new mode with xrandr, and then apply it.
1. Obtaining Mode Information
You can get mode information by entering the command below.
2. Adding Mode to xrandr
Create and register a new mode that does not exist in xrandr, referencing the information obtained above. For example, you can register as below.
Above, a new mode named "Test new" was created. Now, add this mode to xrandr.
@ To view the name of the connected display device
The connected display device may be named XWAYLAND0, HDMI0, HDMI-0, etc. Change it to the correct name. If you want to see the list, use the command below.
3. Applying the Added Mode
Finally, use the --output and --mode options to apply the changes.
This concludes the process. Check to see if the connection mode has changed correctly.
We have learned how to change and apply monitor resolution in Linux. In my case, the method above did not work. Usually, this may be due to driver issues or HDMI version issues, and using the latest version may resolve the problem. Another solution is to use a different connection method. In my case, HDMI to HDMI did not work, but DP to Type C did.
After resolving the issue, the 2560 x 1080 (21:9) mode was added.How to Use Monitor Resolution in Ubuntu 22, Including Wide Monitors
First, to change the resolution in Ubuntu, right-click on the desktop and go to Display settings to adjust the resolution. The problem arises when the desired resolution is not listed after selecting the connected monitor.
Such issues are common while using Ubuntu, and while I thought it could be quickly fixed, it wasn't that easy. You can select resolutions using xrandr or arandr.
Changing Resolution Using xrandr
xrandr is a Linux command that registers and changes the necessary extent on the display. arandr provides similar functionality but in a more straightforward graphical user interface. Here, we will explore how to use xrandr.
To use xrandr, you need to obtain mode information, register a new mode with xrandr, and then apply it.
1. Obtaining Mode Information
You can get mode information by entering the command below.
$ gtf 2560 1080 60
2560x1080 @ 60.00 Hz (GTF) hsync: 67.08 kHz; pclk: 230.76 MHz
Modeline "2560x1080_60.00" 230.76 2560 2728 3000 3440 1080 1081 1084 1118 -HSync +Vsync
2560x1080 @ 60.00 Hz (GTF) hsync: 67.08 kHz; pclk: 230.76 MHz
Modeline "2560x1080_60.00" 230.76 2560 2728 3000 3440 1080 1081 1084 1118 -HSync +Vsync
2. Adding Mode to xrandr
Create and register a new mode that does not exist in xrandr, referencing the information obtained above. For example, you can register as below.
$ xrandr --newmode "Test new" 230.76 2560 2728 3000 3440 1080 1081 1084 1118 -HSync +Vsync
Above, a new mode named "Test new" was created. Now, add this mode to xrandr.
$ xrandr --addmode XWAYLAND0 "Test new"
@ To view the name of the connected display device
The connected display device may be named XWAYLAND0, HDMI0, HDMI-0, etc. Change it to the correct name. If you want to see the list, use the command below.
$ xrandr --listactivemonitors
3. Applying the Added Mode
Finally, use the --output and --mode options to apply the changes.
$ xrandr --output XWAYLAND0 --mode "Test new"
This concludes the process. Check to see if the connection mode has changed correctly.
In Conclusion
We have learned how to change and apply monitor resolution in Linux. In my case, the method above did not work. Usually, this may be due to driver issues or HDMI version issues, and using the latest version may resolve the problem. Another solution is to use a different connection method. In my case, HDMI to HDMI did not work, but DP to Type C did.
Perhaps you're looking for the following text as well?